Manage team membership
Overview
Teams consist of one or more resources, which can be people or assets, that have a defined start date and, optionally, a defined end date for their membership. The start and end dates represent when the resources are available to work as part of the team. Each resource has their own availability within the period.
Changes to team resources (adding, deleting, or editing) may impact the job allocations of associated work items, but only if those items are still open. Locked, canceled, or completed work items won’t be affected.
View team resources
The team’s Resources page shows a list of records for each period that a resource (person or asset) is a member of the team. If a resource is part of a team for the months of April and June, but not May, then there will be two resource records in the list; one for each month of membership.
To view a team’s resources, do the following steps:
- In the web app navigation menu, click Resources > Teams and click the name of the team you want to view.
- From the team’s Details tab, click the Resources tab.

The team’s Resources tab displays with a list of resource records for the team, if any have been added.
Sort and filter the list of resources
The Resources tab has sorting and filtering to customize your view of the user list. You can also customize which columns are visible and save your sort, filter, and column configrations as reusable, sharable views.
Search for a team resource record
The search bar can be used to only show resource records that match the search term. The search is dynamic and matches on one or more characters or numerals.
Add a resource to a team
Before resources can be added to a team, they must first be created in Skedulo.
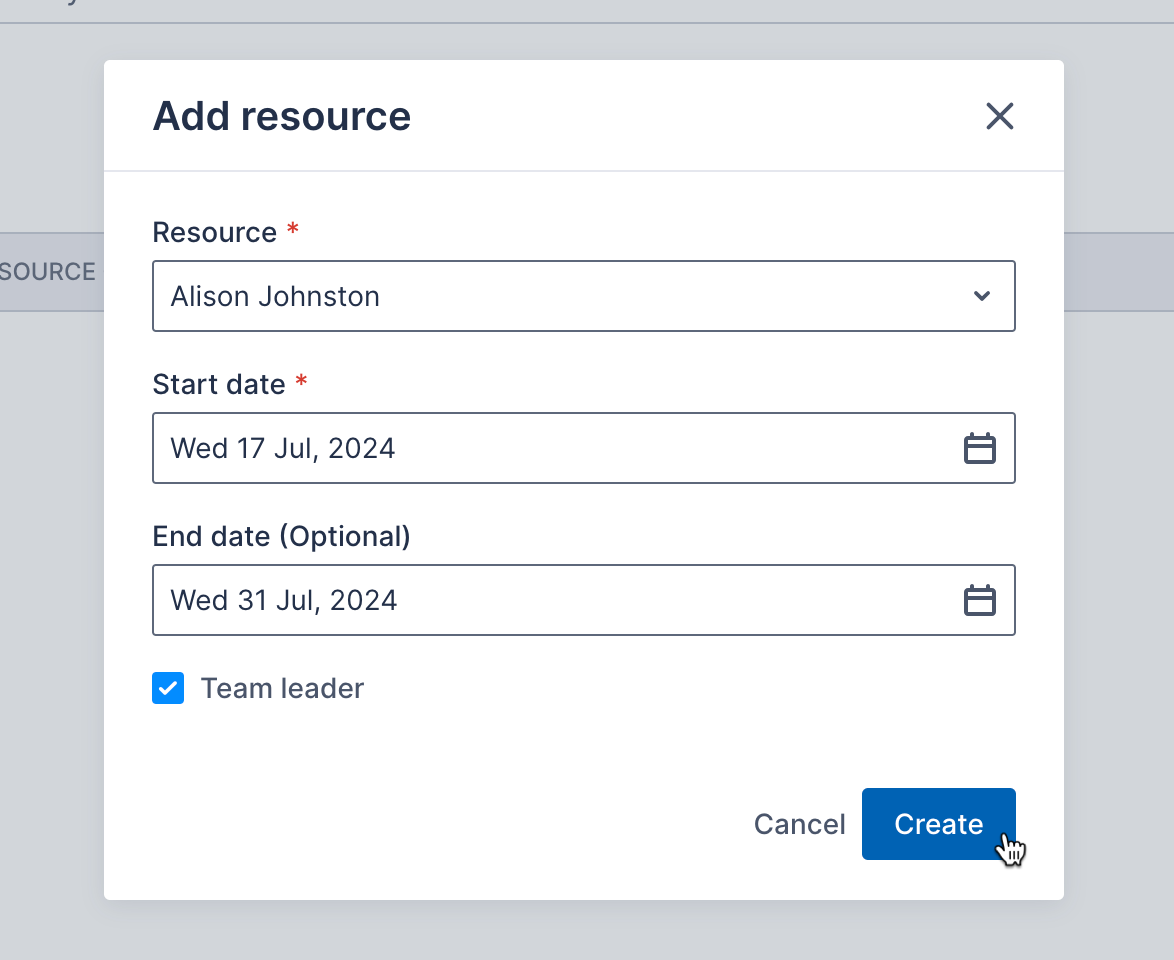
- From the team’s Details tab, navigate to the Resources tab. A list of team resources displays (or an empty list, if you are adding the first resource).
- Click Add resource.

- Select a resource from the Resource drop-down list.
- Click the Start date calendar icon to select a date from which the resource will be available to work in the team.
- If required, click the End date calendar icon to select a date at which the resource will cease being in the team.
- If the resource is the team leader, then click to select Team leader.

- To add the resource and return to the list of resources in the team, click Create. To return to the resource list without adding the resource to the team, click Cancel.
If the team is being allocated to an open job and a new resource member is added to it, then the job allocation will also be updated.
Edit a team resource record
To make changes to a resource’s start or end date, or to assign or unassign them as the team lead, do the following steps.
- In the Team > Resources tab, click the checkbox on the resource record you want to edit.

- Click Edit.

- Make changes to the record, as required.
- To save the changes and return to the list of resources, click Save. To return to the list without making changes, click Cancel.
Any edits made to a resource will also be reflected in all existing jobs assigned to that team.
Assign a team lead
The team leader drives the completion of the work and the completion details, including the work status and times. You can assign this role to one or more team resources when you edit a resource record.
Remove a team resource record
To remove a resource’s team membership record, do the following steps.
- In the Team > Resources tab, click the checkbox on the resource record you want to edit.

- Click Delete.

- To remove the record and return to the list of resource records, click Confirm. To return to the list without removing the record, click Cancel.
If the resource is assigned to existing jobs within the team, an information panel will notify you that “[Resource Name] will be deallocated from JOB-xxxx, JOB-xxxx work items.” It lists all affected jobs to ensure you’re aware of the impact. Clicking “Delete Resource” removes the resource from the team and deallocates them from the listed jobs.
Up to 25 resources can be selected and then removed from a team at a time.
Feedback
Was this page helpful?