Create, edit, and delete teams
Overview
Teams are a type of resource and they can be managed in a similar way to other resources, such as people and assets. Accessing teams is also done in the same way from the navigation menu.
View a list of teams
To access the Teams list, where you can view teams and manage aspects of them, including membership and schedule, do the following:
- Navigate to Resources > Teams.

The list of teams displays.
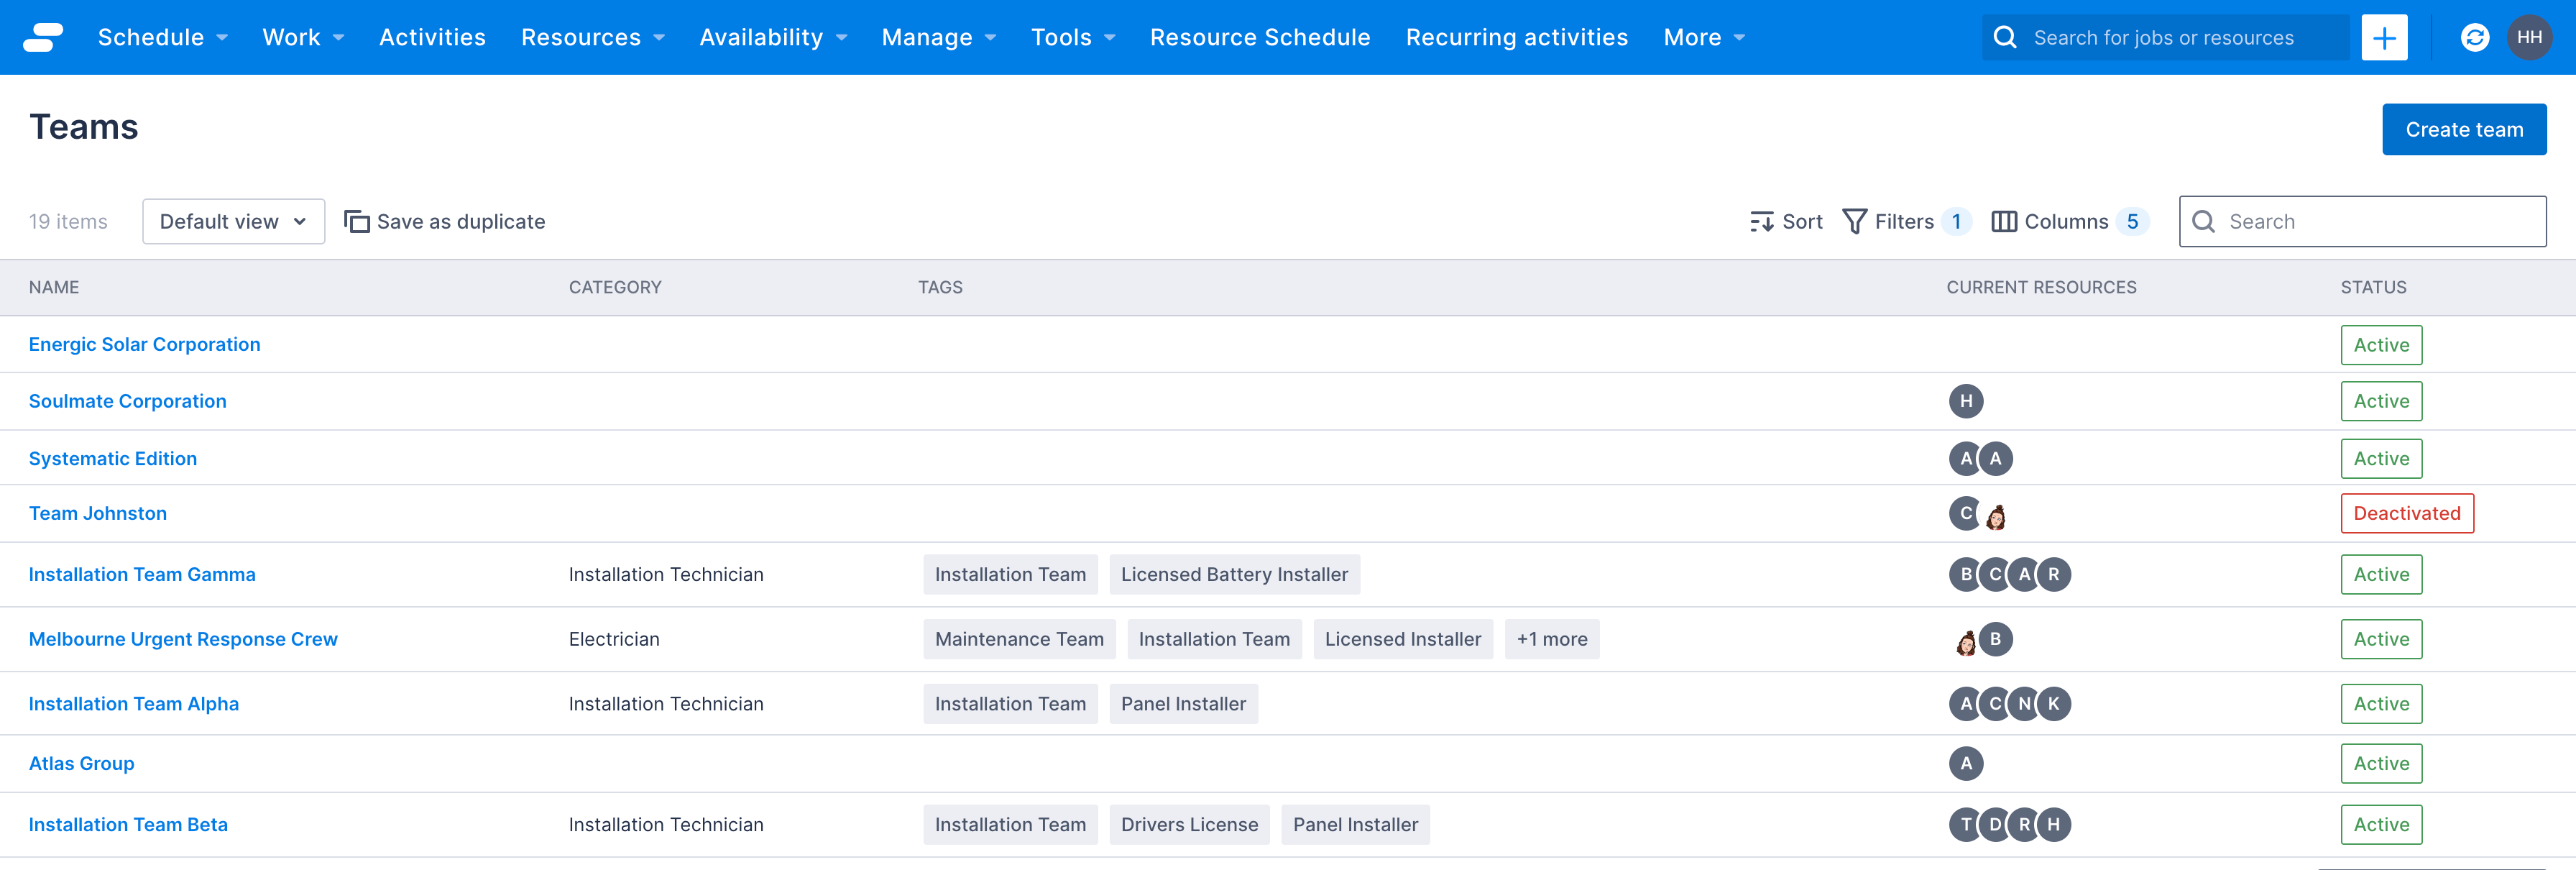
Active and inactive teams are listed.
Sort and filter the list of teams
The Teams page has sorting and filtering to customize your view of the list. You can also customize which columns are visible and save your sort, filter, and column configrations as reusable, sharable views.
Search for a team
The search bar can be used to only show teams that match the search term. The search is dynamic and matches on one or more characters or numerals.
Create a new team
To add a team, do the following steps.
- On the Teams list page, click Create team.

- Enter a Name for the team and select the team’s Region from the drop-down list.
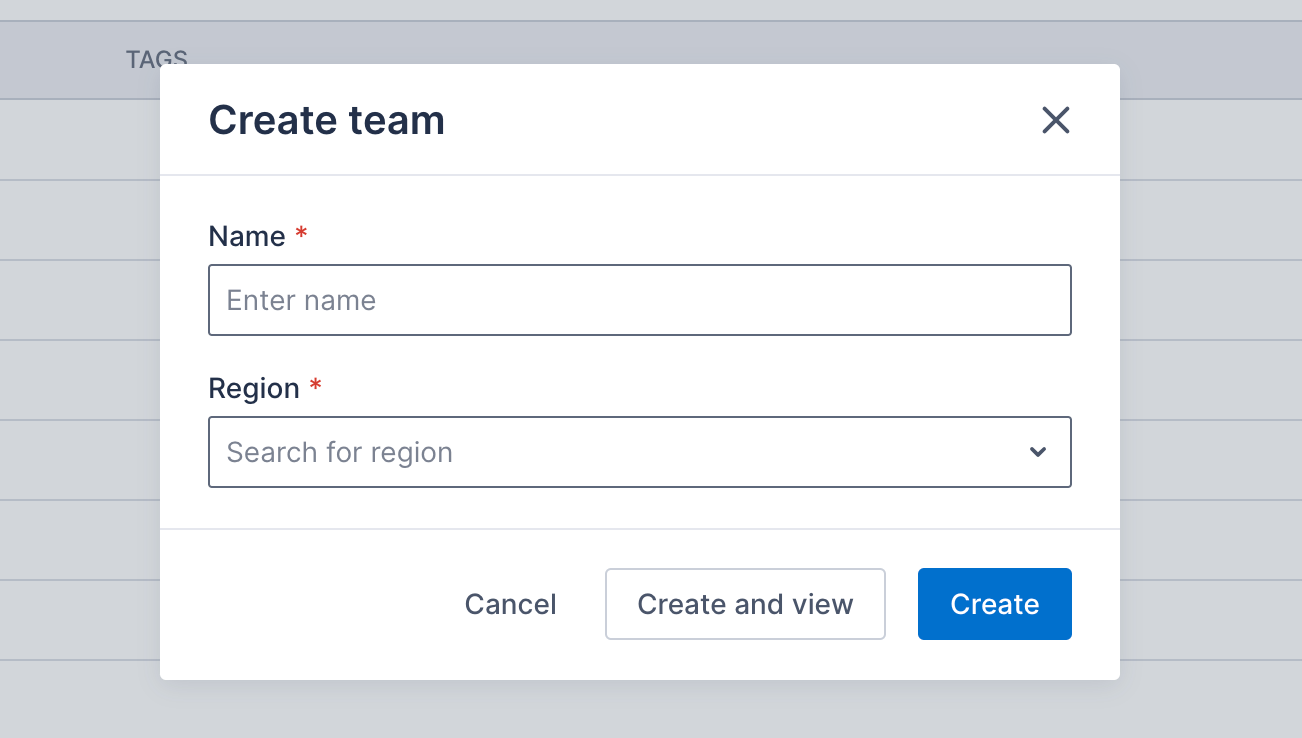
- Do one of the following:
- To add the team and return to the Teams list, click Create.
- To add the team and open the new team’s Details page, click Create and View.
- To return to the Teams list without creating a team, click Cancel.
View a team’s details
To view a team’s details, do the following steps:
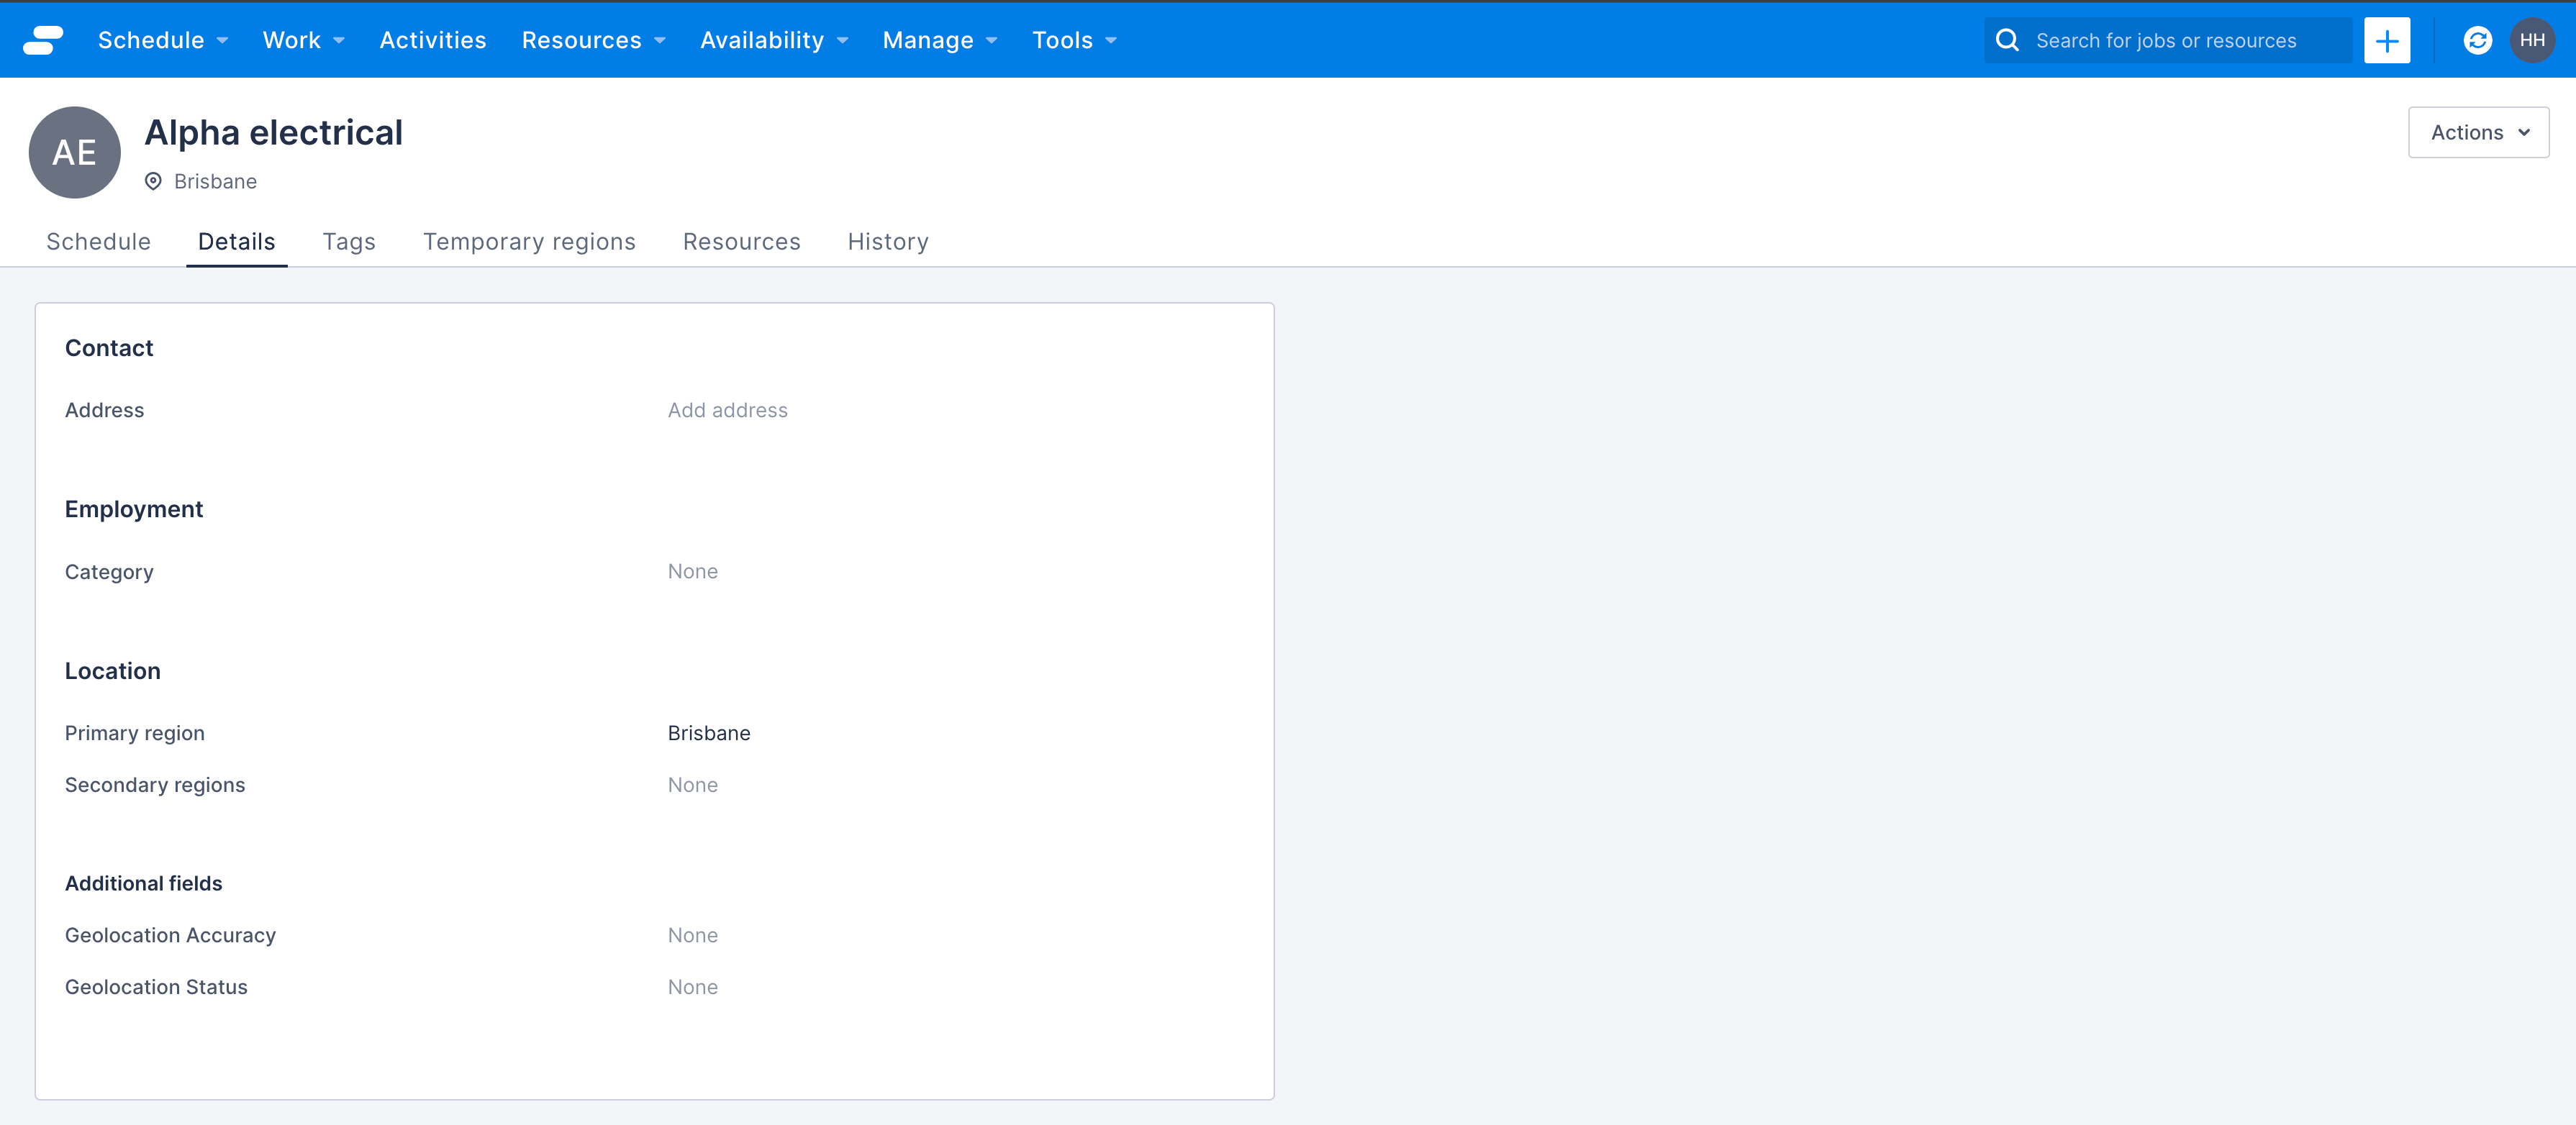
- From the Teams list, click the name of the team you would like to view.

The team Details tab displays.
Edit a team’s details
To make changes to a team’s details, do the following steps:
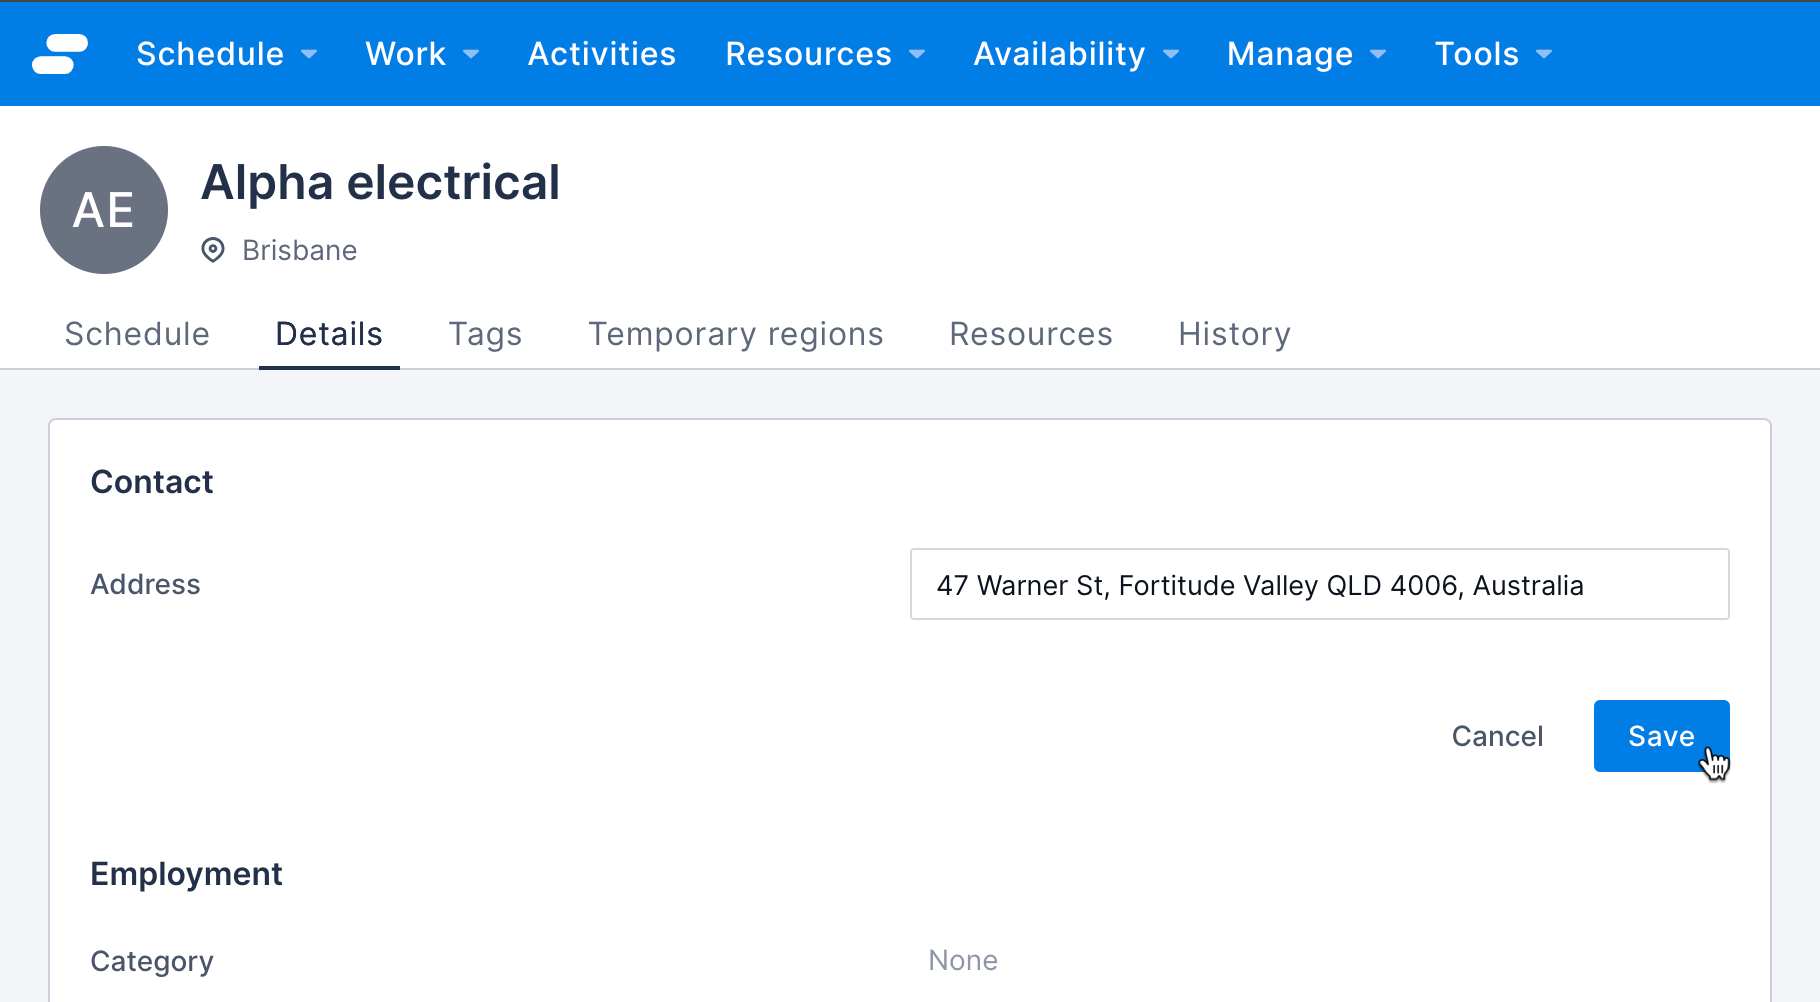
- From the team Details page, hover over the field you want to edit and then click the pen icon.
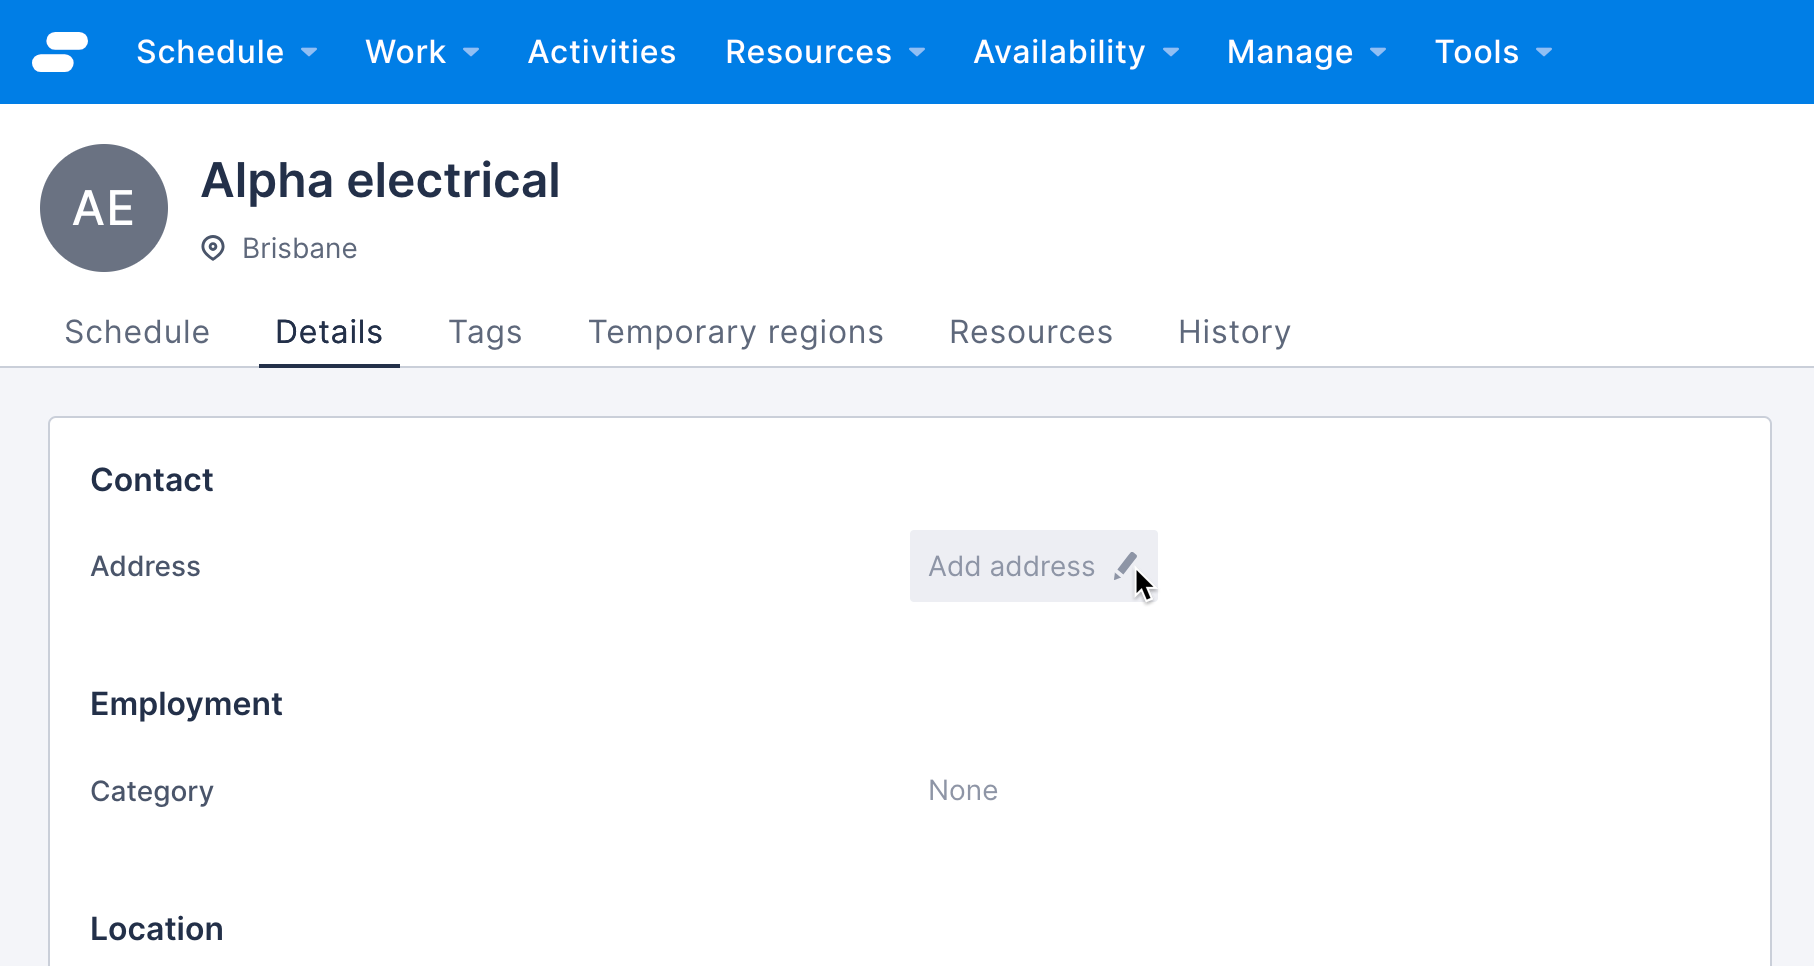 The field is now in edit mode.
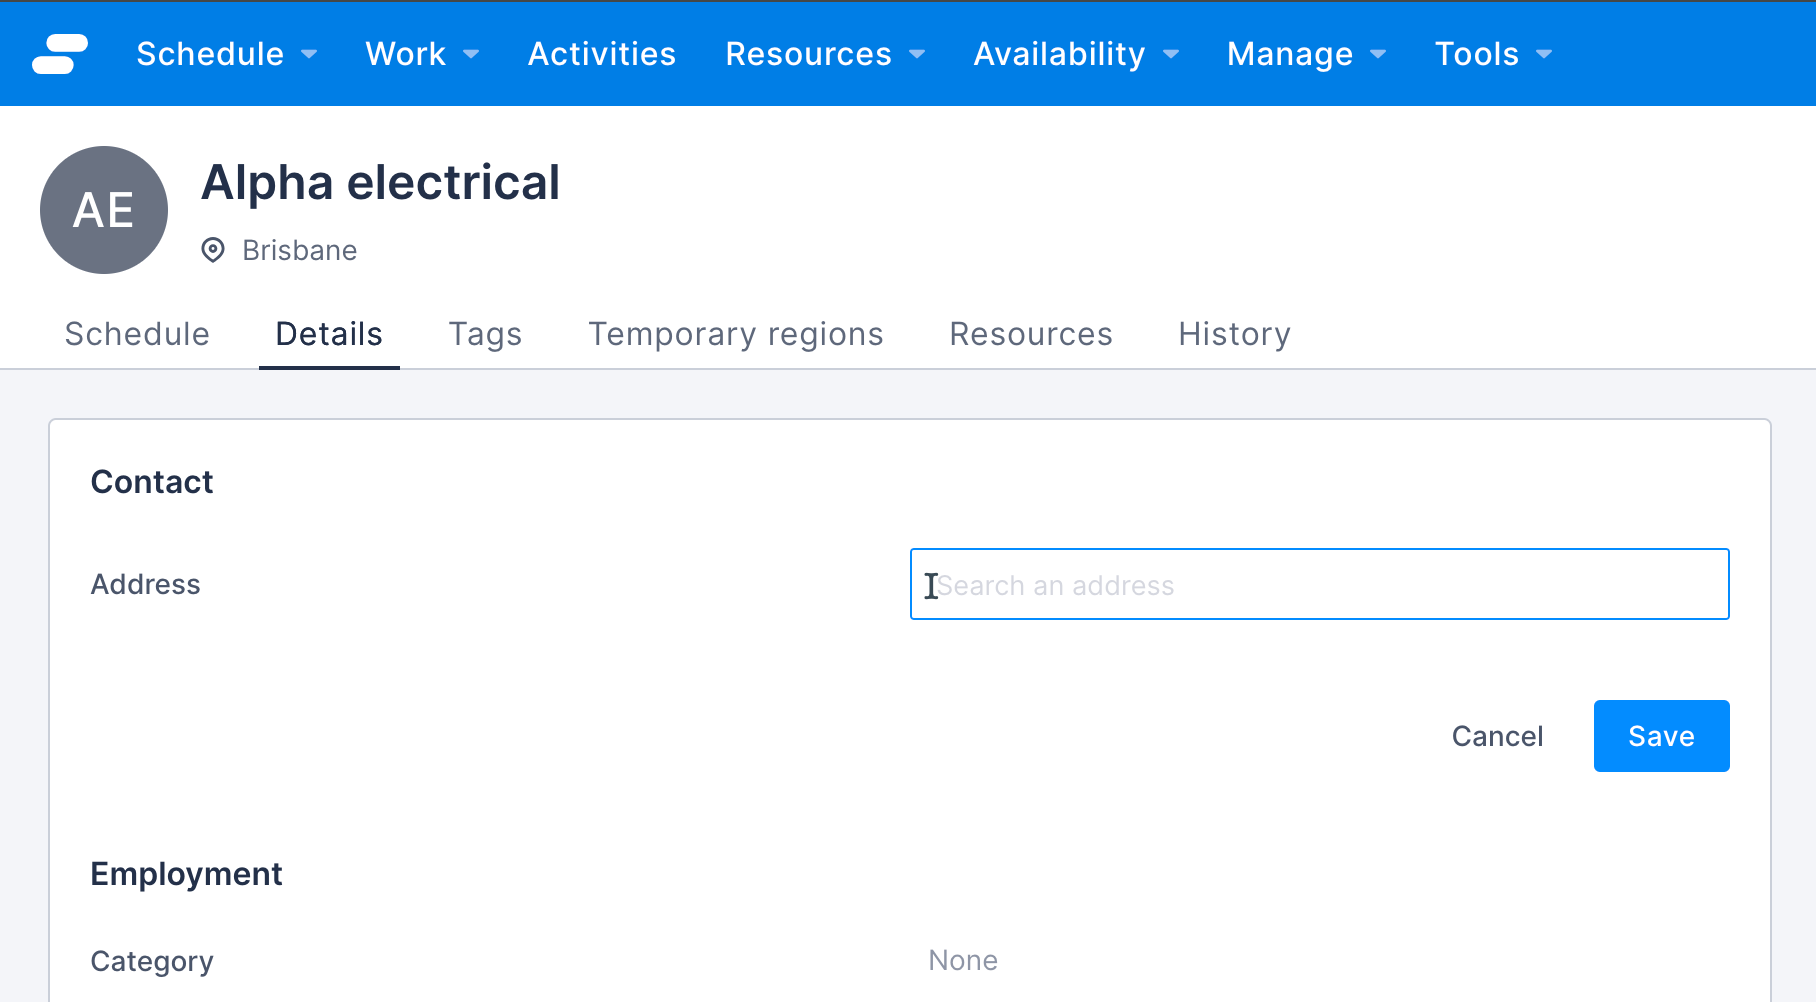
- Make changes as required.
- To save the changes, click Save. To exit edit mode without saving changes, click Cancel.
Add tags to a team
As with other types of resources, tags can represent a particular skill or competency that the team holds, such as “Occupational Therapy", “First aid level 1”, or “Rope access”.
Tags help identify teams to allocate to jobs and operate with other criteria, such as availability. This means that only teams that are available and that have the required tags will be displayed in the initial job allocation list.
Tags must be configured in Skedulo before they are added to a team. See the tag documentation for more information.
To add a tag to a team, do the following steps.
- From the Teams > Details tab, navigate to the Tags tab.

- Click the Add tag drop-down and select a tag.
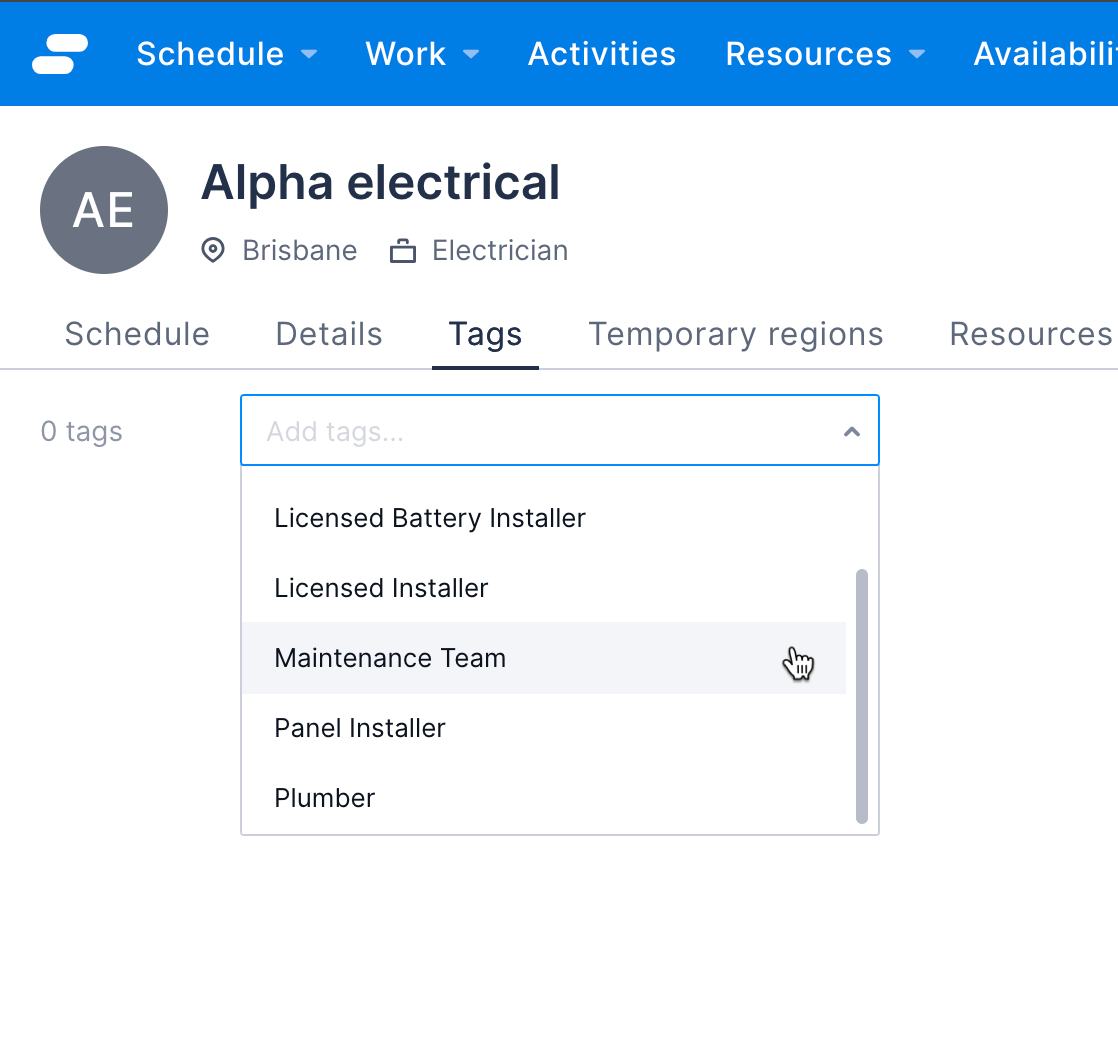
- If required, add or change the expiry date by clicking the Expiry field.

To remove a tag from a team, do the following:
- Click the x icon at the end of the row and then click Yes, remove to confirm.
View a team’s history
To view a list of changes that have been made to a team’s data, including when records have been edited and when resources have been added or removed.
To view the changes to a team over time, do the following:
- From the team Details tab, navigate to the History tab. The list of changes to the team and the user who performed them displays.
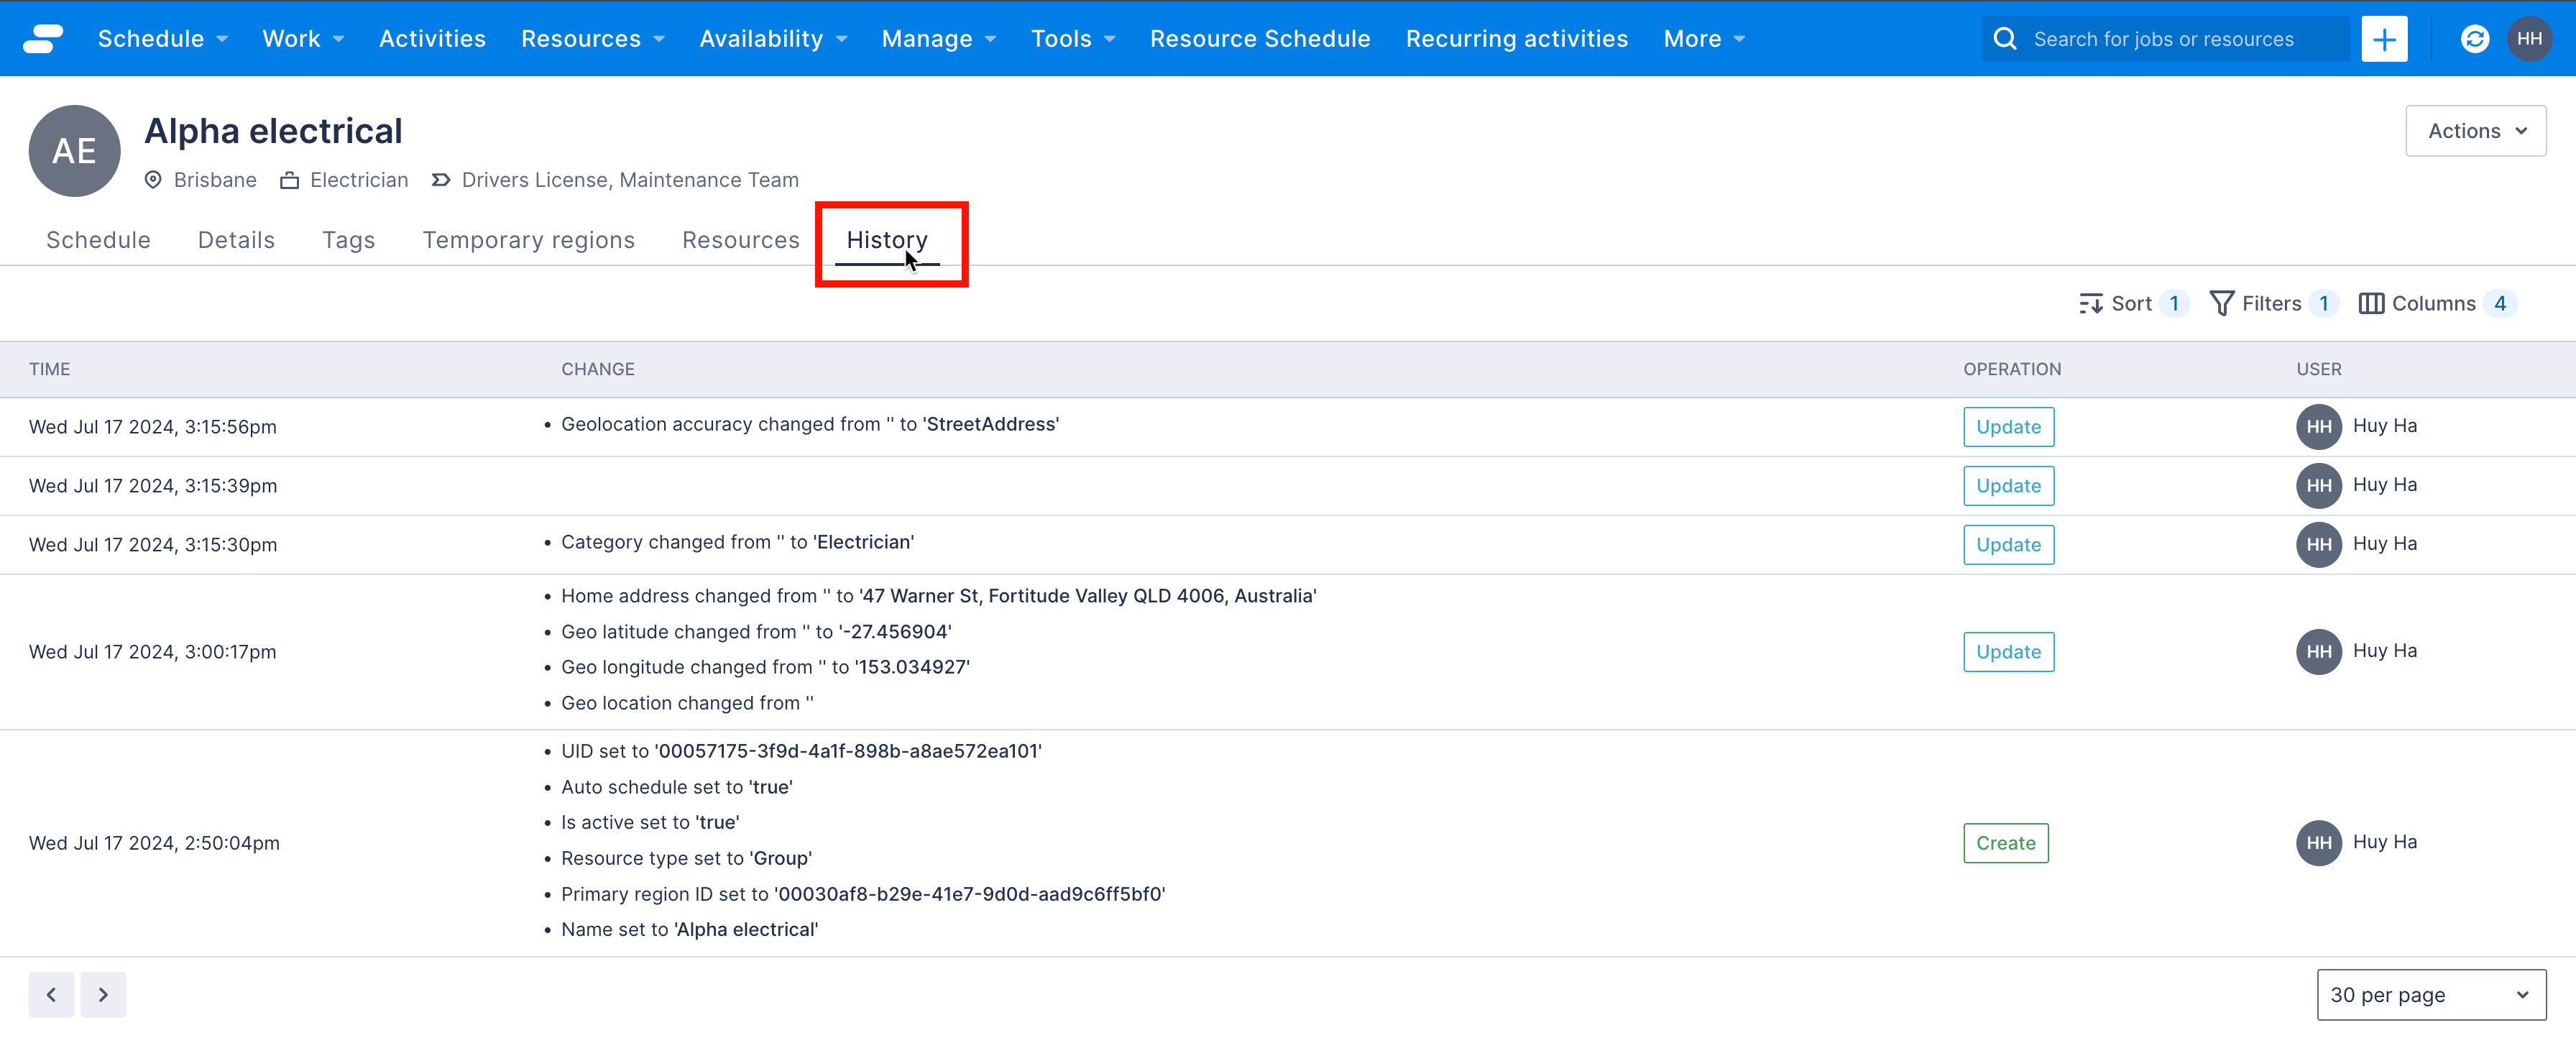
The list can be sorted and filtered, as required.
Deactivate a team
To deactivate a team, do the following steps.
-
From the Resources > Teams list, click the name of the team to deactivate. The team Details tab opens.
-
Click the Actions drop-down in the top-right corner of the screen. This drop-down is available on all tabs within the team record.
-
Click Deactivate resource.

-
To deactivate the team and return to the list of teams, click Deactivate. To return to the team without deactivating it, click Cancel.
Feedback
Was this page helpful?